SQLite
This section describes how to connect to SQLite database from Datero.
Environment
Environment setup for the SQLite connector is different from the other connectors like MySQL or Postgres. Main reason is that SQLite is a file-based database. It doesn't require any server to run. And hence, it doesn't have any network interface to connect to.
Main requirement for the Datero sqlite connector is to have SQLite database file accessible on the file system.
So, what we need is sqlite database file itself.
Having that on hands, we just mount it to the datero container as a file in a local folder and connect to it from there.
We couldn't use datero container created in the installation section, because we created it without any mounts defined.
Let's spin up a new datero_mount container but this time specify a mount folder for the sqlite database file.
We mount current folder $(pwd) to the /data folder inside the container.
GitBash on Windows
If you are on Windows, you must specify absolute path to the current folder.
For example, c:/Users/user/some/path.
Or expand current directory with %cd% if you are running the command from cmd.
Do not run docker commands with folder mounts specified from GitBash.
Because GitBash is a Linux emulator for Windows, it will translate Windows paths to Linux paths.
And docker will not be able to find the folder.
# stopping currently running container, if any, to free up ports
docker stop datero
# starting new container with current folder mounted to /data folder inside the container
docker run -d --name datero_mount \
    -p 80:80 -p 5432:5432 \
    -e POSTGRES_PASSWORD=postgres \
    -v "$(pwd):/data" \
    chumaky/datero
SQLite database
Now we need to create a sqlite database file.
To do so, we have to install sqlite command line utility.
It's available for all major operating systems.
You can find installation instructions in the official documentation .
Once installed, make sure it's added to your PATH. It must be callable from command line.
sqlite3 --version
3.42.0 2023-05-16 12:36:15 831d0fb2836b71c9bc51067c49fee4b8f18047814f2ff22d817d25195cf350b0
Now we can create a new database file calendar.db and create some test table in it.
sqlite> create table months(id int, name text);
sqlite> insert into months values (1, 'January'), (2, 'February'), (3, 'March');
sqlite> .headers on
sqlite> select * from months;
id|name
1|January
2|February
3|March
sqlite> .quit
Now we are ready to connect to the sqlite database from datero.
Docker image
Unfortunately, there is no official SQLite docker image is available.
But if you still prefer to use docker image instead of installing sqlite utility on your machine, you can use sqlite3 image.
Its usage is pretty straightforward and well described in a project's readme file.
You have to mount the local folder to some folder inside the container.
Then by executing sqlite3 command from the container you will be able to create a database file in the mounted folder.
Datero connection
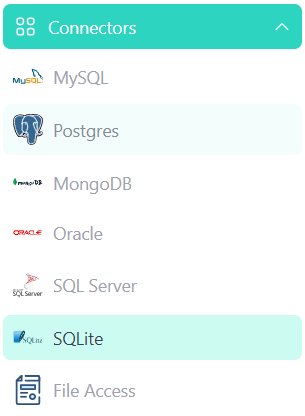
Open Datero web ui at http://localhost and click on the SQLite entry in the the Connectors navigation section on the left.
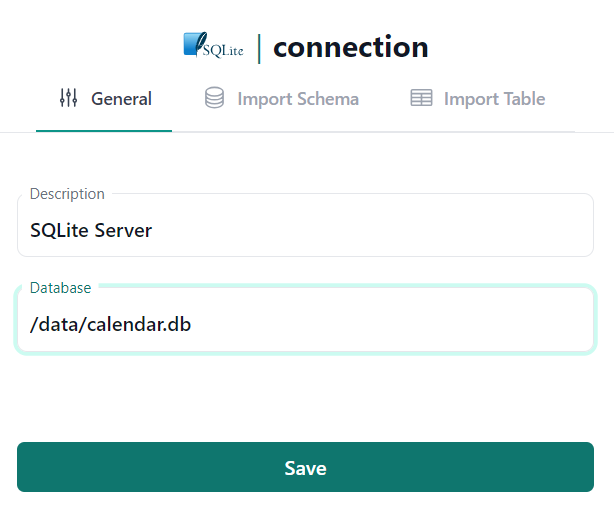
Enter any descriptive name in the Description field. For example, SQLite Server.
Enter /data/calendar.db as the Database value.
The /data folder is the folder within the container into which we mounted our current directory.
And calendar.db is the database file we created earlier within current directory via sqlite3 calendar.db command.
Click Save to create the Server logical object.
| Connector | Connection Form |
|---|---|
 |
 |
Schema import
After the Server is created, we can import database schema from it.
Connection wizard will switch the tab and open Import Schema form.
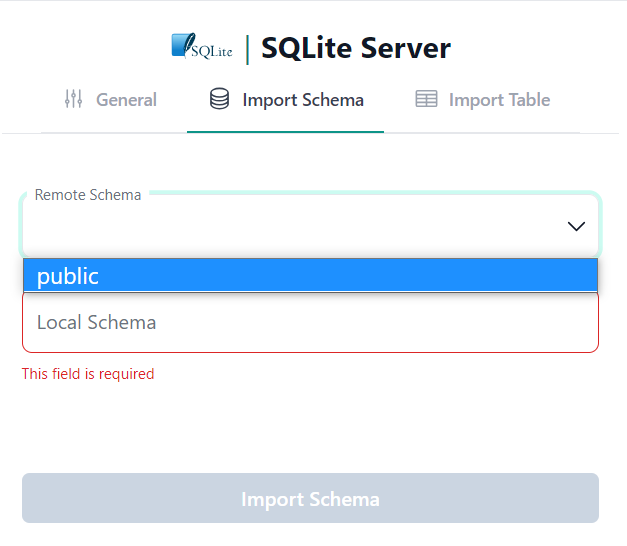
SQLite doesn't have notations of databases or schemas.
Database file is a single database/schema which is referred to as public by SQLite connector.
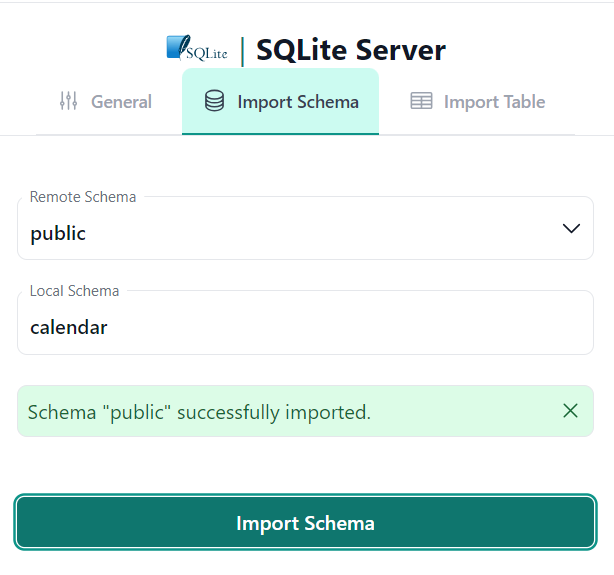
In the Remote Schema select public schema.
| Server Object | Import Schema |
|---|---|
 |
 |
For example, we want to import our SQLite database into the calendar local schema.
To do that, type calendar into the Local Schema input field and click Import Schema button.
Important
Schema import doesn't physically copy any data. For every source table and view it creates an object of a special type in a local schema. This object type is called foreign table. It implements data virtualization pattern.
Querying foreign table will automatically fetch data from the source database. If supported by connector, any filtering, sorting, grouping, etc. will be pushed down to the source database. This means that only the data that is needed will be fetched.
If you change the schema in the source database, you will need to re-import it in Datero to reflect the changes.
Thus, schema evolution is handled automatically just by re-importing the schema.
If everything is correct, you will see the success notification message.
We are ready now to query our SQLite database from Datero.
Data Querying
Click on the Query Editor icon in the left navigation panel.
You will see calendar schema in the Datero object tree.
If you expand it, you will see months table from original sqlite database.
Its definition was automatically imported.
To query data just write a query in the editor and press Ctrl+Enter or click green Run button above.
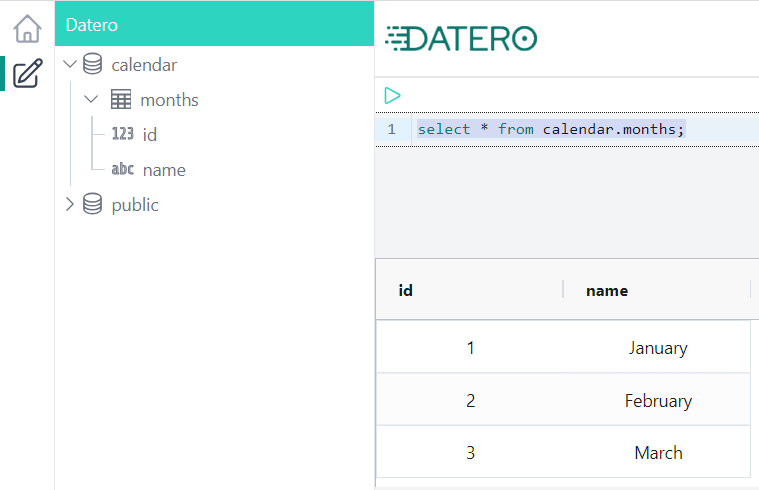
And that's it! You have successfully connected to the SQLite database from Datero and queried the data.
Summary
Of course, having just a single datasource is not very interesting. It's non-distinguishable from the direct connection to SQLite via any other tool, like DBeaver. But the real power of Datero is in its ability to connect to multiple datasources and join data from them.
This is what is not possible via the "direct connection" tools. Even if they support connecting to multiple datasources, they don't support joining the data from them.