VM instance
To run Datero on GCP VM instance, you need to create a VM instance first. Exact procedure to create a VM instance is out of scope of this guide. Please refer to the official documentation for that. You can use any OS you want, but we will use Ubuntu 22.04 in this guide.
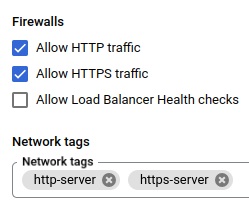
One thing to note is that you need to open some HTTP/HTTPS port for the VM instance.
Default 80 or 443 ports will work just fine.
You can do that in the Firewall section of the VM instance settings.
This is to allow access to the Datero web application from the outside world.
Datero serves web application through nginx over HTTP on port 80.
Injecting SSL certificate into container is doable, but it is out of scope of this guide.
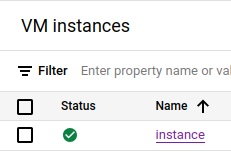
To simplify connection to the instance, you could use gcloud command line tool.
Assuming you have VM named instance you could login to it by running:
$ gcloud compute ssh instance
Welcome to Ubuntu 22.04.3 LTS (GNU/Linux 6.2.0-1019-gcp x86_64)
user@instance:~$
Docker installation
Once VM instance is created, you need to install docker on it.
Again, exact procedure is out of scope of this guide.
You could install it from the Ubuntu itself by using apt or snap package managers.
Alternatively, you could use official docker documentation for that.
We would advise to stick with Docker's official documentation.
For your convenience, below is a compiled version which extends official guide a bit.
Except installing docker itself, it also adds currently logged in user to the docker group.
This is to allow running docker commands without sudo prefix.
Docker installation on Ubuntu 22.04
Datero installation
Once you have docker installed, you can run Datero container.
Firstly, download the image.
Having the image, you can run the container.
The only mandator parameter to specify during container run is POSTGRES_PASSWORD.
It's dictated by the official image of postgres database.
To have an access to the web application and database we also exposure ports 80 and 5432.
Flag -d will run the container in the background.
We also name the container datero to be able to refer to it later.
docker run -d --name datero \
    -p 80:80 -p 5432:5432 \
    -e POSTGRES_PASSWORD=postgres \
    chumaky/datero
Access Datero UI
Now just note down the external IP address of the VM instance and access web application on http://<external_ip>.
Underlying postgres database is exposured on 5432 port.
Because of firewall, it won't be accessible by default.
But you can access it over your VM instance internal IP address from within your Google Cloud environment.
While not recommended, you could also open 5432 port on your instance firewall.
That will make the database accessible over <external_ip>:5432.
Of course, don't do it for production setup!
Congratulations! You have successfully installed Datero on GCP VM instance.
Next steps
You might find it useful to check the Overview section. It will make you familiar with what you will get after the installation.
More details on initial setup could be found in Installation section.
For complete use-case example, please go to the Tutorial section.
For individual datasources configuration, please refer to Connectors section.