Cloud SQL
In a previous sections we described services that can be used to install Datero on GCP. You can do this on VM instance, GKE, or Cloud Run.
Now let's overview service that can be used as a datasource for Datero. The most traditional one is relational database. In GCP you can use Cloud SQL service for that.
We will create a PostgreSQL and MySQL databases in the Cloud SQL. Afterwards, we will connect and join tables from them in Datero.
Info
For the full fledged example, please refer to the Tutorial. For the list of supported datasources, please refer to the Connectors section.
Cloud SQL instance
Firstly, we have to create Cloud SQL instance. Exact procedure to create it is out of scope of this guide. But you can refer to the official documentation how to spin up postgres and mysql instances.
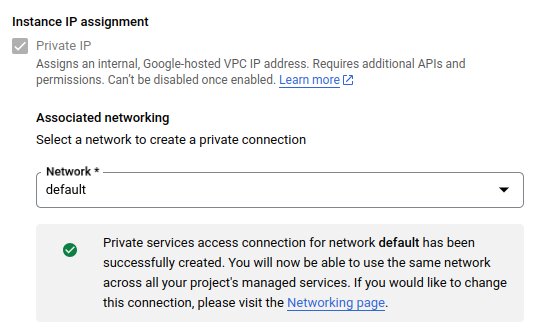
During instance launch you could specify whether you want to have public IP or not. General recommendation for databases is to use private IP. Cloud SQL is a GCP managed service, that is run in a separate system VPC. To allow access to your instance by its private IP, you have to create a peering connection between your VPC and the one that is used by Cloud SQL.
To make it happen, you have to pick-up a subnet from your VPC where Cloud SQL, as a service, will be creating private connection to your VPC. Having done that, you will be able to connect to your instance by its private IP from VM launched in that subnet of your VPC. This concept is similar to VPC service endpoints in AWS.
Postgres
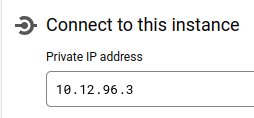
Assuming you created a postgres instance and it has been assigned some private IP address.
During instance creation you must specify a password for the postgres user.
For simplicity, we used postgres as a password.
To connect to it we can leverage VM named instance that we created in the previous section.
It had been spun up in the same subnet that we picked up for private connection setup with Cloud SQL.
This guarantees that we can connect to our Cloud SQL instance by its private IP.
To connect to the instance, we have to leverage psql client on the VM.
To avoid direct installation of psql on the VM, we can use postgres docker image.
We can run it in the interactive mode and connect to the instance from there.
The following code abstract does the following:
- runs
postgresdocker image in the interactive mode with automatic removal of the container after exit - instead of starting a database server, it runs just
bashshell - checks
psqlutility version - sets
PGPASSWORDenvironment variable to the passwordpostgresthat we specified during our Cloud SQL instance creation - connects to the instance by its private IP
10.12.96.3viapsqlclient - connection is done to the
postgresdatabase withpostgresuser
instance:~$ docker run --rm -it postgres:alpine bash
d2ccdd73d5fd:/# psql --version
psql (PostgreSQL) 16.1
d2ccdd73d5fd:/# export PGPASSWORD=postgres
d2ccdd73d5fd:/# psql -h 10.12.96.3 postgres postgres
psql (16.1, server 15.4)
postgres=>
We used latest postgres:alpine image which is of version 16.1.
It has psql client of the same version installed in it.
In the same time our Cloud SQL instance is running postgres version 15.4.
And output psql (16.1, server 15.4) says it explicitly.
That we are using psql client version 16.1 connected to the postgres database server version 15.4.
Once being connected, we create finance schema and departments table in it.
postgres=> create schema finance;
CREATE SCHEMA
postgres=> create table finance.departments(id int, name text);
CREATE TABLE
postgres=> insert into finance.departments values (1, 'Manufacturing'), (2, 'Sales'), (3, 'Management');
INSERT 0 3
postgres=> select * from finance.departments;
 id |     name
----+---------------
  1 | Manufacturing
  2 | Sales
  3 | Management
(3 rows)
Datero 2 Postgres connection
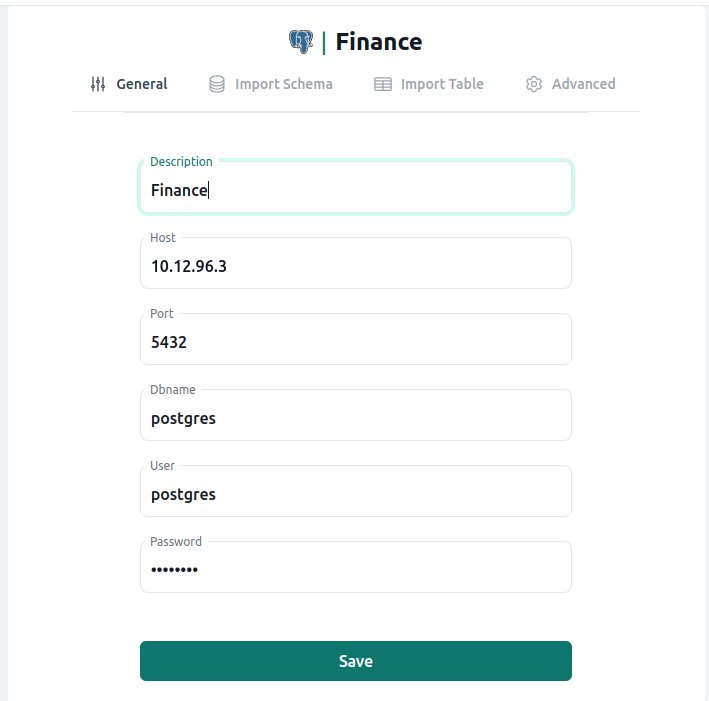
Now we can connect to the same instance from Datero. All we need to do is create a Postgres server entry and specify private IP address of our Cloud SQL instance.
Info
Please see Overview of how to create a server entry and import schema. For the full fledged example, please refer to the Tutorial.
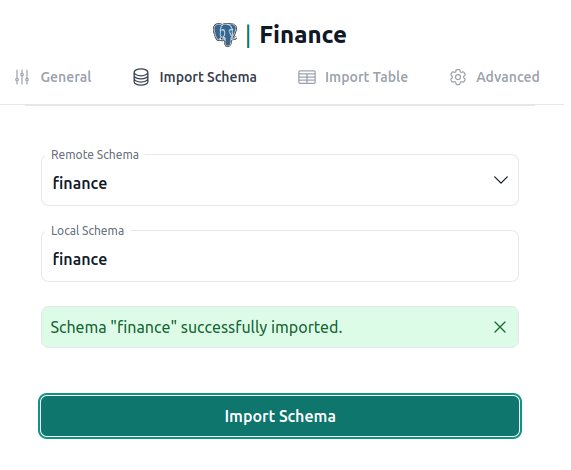
Once server entry is created, we can import finance schema.
And finally, query the departments table.

MySQL
Same procedure repeats for MySQL instance. We create Cloud SQL instance for MySQL and assign to it private IP address.
During instance creation you must specify a password for the root user.
For simplicity, we used root as a password.
To connect to it we will use the same VM named instance as for postgres Cloud SQL instance above.
To connect to the instance, we have to leverage mysql client on the VM.
To avoid direct installation of mysql on the VM, we can use mysql docker image.
We can run it in the interactive mode and connect to the instance from there.
The following code abstract does the following:
- runs
mysqldocker image in the interactive mode with automatic removal of the container after exit - instead of starting a database server, it runs just
bashshell - checks
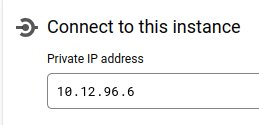
mysqlutility version - connects to the instance by its private IP
10.12.96.6viamysqlclient - connection is done under the
rootuser with therootpassword that we specified during our Cloud SQL instance creation
instance:~$ docker run --rm -it mysql bash

bash-4.4# mysql --version
mysql  Ver 8.3.0 for Linux on x86_64 (MySQL Community Server - GPL)

bash-4.4# mysql -h 10.12.96.6 -uroot -proot
mysql: [Warning] Using a password on the command line interface can be insecure.
Welcome to the MySQL monitor.  Commands end with ; or \g.
Your MySQL connection id is 3255
Server version: 8.0.31-google (Google)
We used latest mysql:latest image which is MySQL version 8.3.0.
It has mysql client of the same version installed in it.
In the same time our Cloud SQL instance is running MySQL version 8.0.31-google.
Having connected to the instance, we create hr schema and users table in it.
mysql> create schema hr;
Query OK, 1 row affected (0.02 sec)

mysql> use hr;
Database changed

mysql> create table users(id int, name text, department_id int);
Query OK, 0 rows affected (0.04 sec)

mysql> insert into users values (1, 'John', 1), (2, 'Mary', 2), (3, 'Peter', 2), (4, 'Scott', 3);
Query OK, 4 rows affected (0.02 sec)
Records: 4  Duplicates: 0  Warnings: 0

mysql> select * from users;
+------+-------+---------------+
| id   | name  | department_id |
+------+-------+---------------+
|    1 | John  |             1 |
|    2 | Mary  |             2 |
|    3 | Peter |             2 |
|    4 | Scott |             3 |
+------+-------+---------------+
4 rows in set (0.01 sec)
Datero 2 MySQL connection
Now we can connect to the same instance from Datero. All we need to do is create a MySQL server entry and specify private IP address of our Cloud SQL instance.
Info
Please see Overview of how to create a server entry and import schema. For the full fledged example, please refer to the Tutorial.
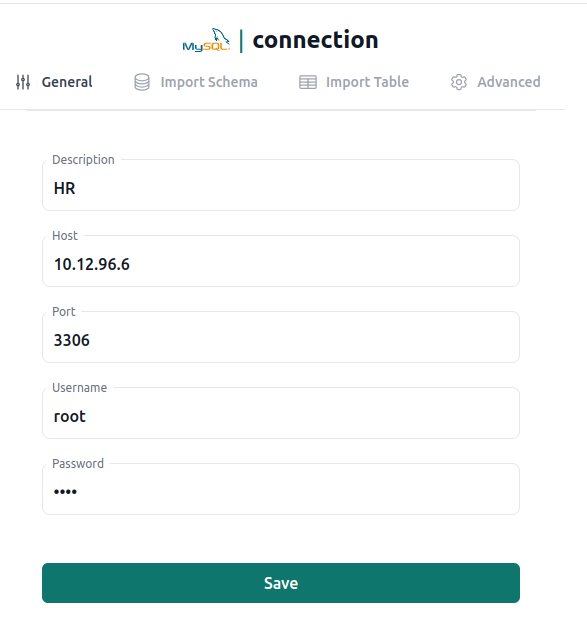
Once server entry is created, we can import hr schema.

Join datasources
Now it's time to use Datero for its intended purpose.
Join data from different datasources within single SELECT statement!

Summary
Let's make a step aside and have a look what we got.
We have a possibility to analyze data from two different databases of different vendors
as if they were located in the same database.
And we have full flavoured SQL to do that.
Moreover, we are not limited just to a SELECT statement.
Depending on connector, you can also change data in a source database.
With Datero you are not locked just to its web application. Under the hood you have fully functional Postgres database. This means that you can connect to and query Datero programmatically with whole variety of drivers/SDKs that Postgres support.
You have to setup your connections in Datero only once. Afterwards, just connect to Datero and query your distributed data. And you have no need to write any ETL for this!
Datero architecture allows to use it as an entermediate ETL node. You don't have to connect to numerous datasources by using different drivers and, probably, even different programming languages. Write data receiving, syncrhonizration and processing logic.
You just connect to Datero, write your logic in SQL and get the result.
If you need to have multi-steps processing, you can store intermediate results in the Datero itself. Then query them in the next step(s). Because, as mentioned earlier, there is a fully functional Postgres database under the hood.