Cloud Run
Cloud Run is serverless platform which allows you to run your containers as a service. To run Datero on Cloud Run, it's required to create such service. Exact procedure to create it is out of scope of this guide. Please refer to the official documentation for that.
Create Service
You can create a service in a various ways. In this guide we will use Google Cloud Console approach. Start by pressing Create service button on the main Cloud Run Services page.
Specify container image
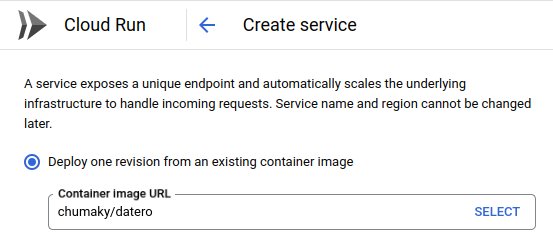
First step is to specify container image(s) to run. In our case, we want to run single Datero container. All-inclusive Datero image is available on Docker Hub .
To do that, we have to select Deploy one revision from an existing container image option and specify chumaky/datero as a container image.
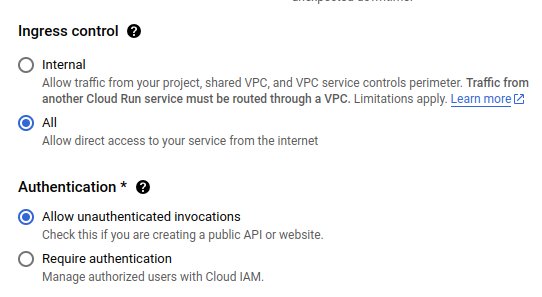
For the demo purposes, we will make our service publicibly accessible. To do that, we have to accept all Ingress traffic and select Allow unauthenticated invocations checkbox.
Container configuration
Next step is to configure container details.
The only mandator parameter to specify during container launch is POSTGRES_PASSWORD.
It's dictated by the official image of postgres database.
Also, we want to access Datero web application over HTTP, so we have to expose port 80 of the container.

Most probably, datasources that you want to access from Datero will be located in the VPC. To allow Datero to access them, you have to specify VPC connector. You can do that in the Networking tab of the service page.

And finally, press Create button to create the service.
Access Datero UI
Once service is created, you can access Datero web application by clicking on the URL link in the service details page.

Congratulations! You have successfully installed Datero on GCP Cloud Run.
Next steps
You might find it useful to check the Overview section. It will make you familiar with what you will get after the installation.
More details on initial setup could be found in Installation section.
For complete use-case example, please go to the Tutorial section.
For individual datasources configuration, please refer to Connectors section.