Google Kubernetes Engine
To run Datero on GKE, you have to create a cluster first. Exact procedure to create it is out of scope of this guide. Please refer to the official documentation for that.
Once you have a cluster, you have to create a deployment. Deployment is a Kubernetes configuration object which specifies how specific application should be run on a cluster. Deployed application constitutes a Workload.
Create Deployment
You can create a deployment in a various ways.
In this guide we will use Google Cloud Console approach.
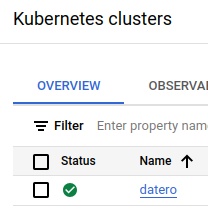
Start creating deployment by pressing Deploy button on the cluster page.
Specify container image
First step is to specify container image(s) to run.
In our case, we want to run single Datero container.
All-inclusive Datero image is available on Docker Hub .
To do that, we have to select "Existing container image" and specify its address chumaky/datero in the Image path input box.
The only mandator parameter to specify during container launch is POSTGRES_PASSWORD.
It's dictated by the official image of postgres database.

After specifying the password, press Done button at the bottom.
Deployment configuration
Next step is to configure resources.
By default, GKE will create a single node pool with 3 nodes.
You have possibility to specify labels for the nodes.
For the demo purposes, we will leave single default app label which will be the same as the deployment name.
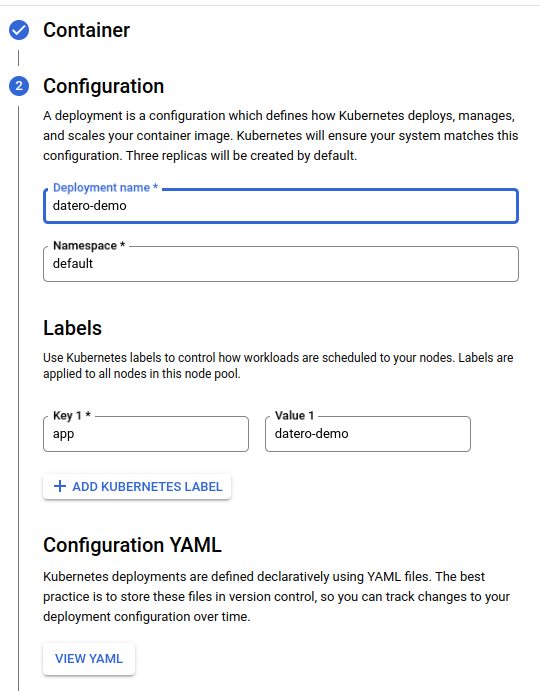
You should also pick-up a target cluster for the deployment.
We will select the datero cluster we have created in the previous step.
Note
Full control over configuration is available via YAML file that could be submitted from the command line. But this is out of scope of this guide.
Press Continue button to proceed to the final step.
Expose service
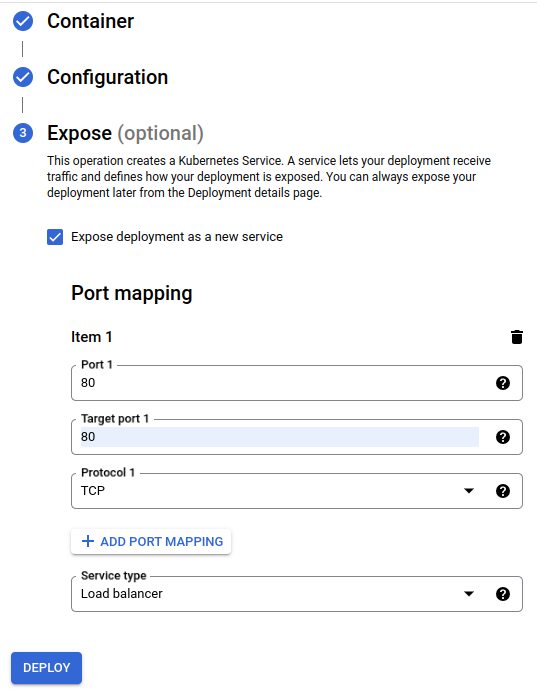
To have a possibility to access Datero web application, we have to expose it as a service.
This is done by mapping the ports of the container to the ports of the cluster.
In our case, we want to expose port 80 of the container to the port 80 of the cluster.
For service type we will select Load balancer.
By default, GKE creates 3 container instances and automatically handles traffic load balancing for them.
Access Datero UI
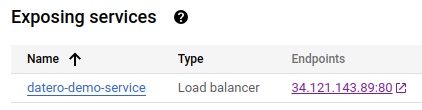
Once deployment is created, you can access Datero web application by clicking on the Endpoints link in the Exposing services section of the cluster page.
Congratulations! You have successfully installed Datero on GCP GKE cluster.
Next steps
You might find it useful to check the Overview section. It will make you familiar with what you will get after the installation.
More details on initial setup could be found in Installation section.
For complete use-case example, please go to the Tutorial section.
For individual datasources configuration, please refer to Connectors section.