Azure Container Instances
Azure Container Instances (ACI) is serverless platform which allows you to run your containers. To run Datero on ACI, you have to create a container instance first. Exact procedure to create it is out of scope of this guide. Please refer to the official documentation for that.
Configure instance
You can create a container instance in a various ways. In this guide we will use Azure portal approach. Just press Create button on the main Container instances page.
Creation procedure is pretty straightforward multi-step wizard. On each step you have to specify various parameters. At the end of the process you will see review page with all the parameters you have specified. A few parameters that you must to specify are as follow:
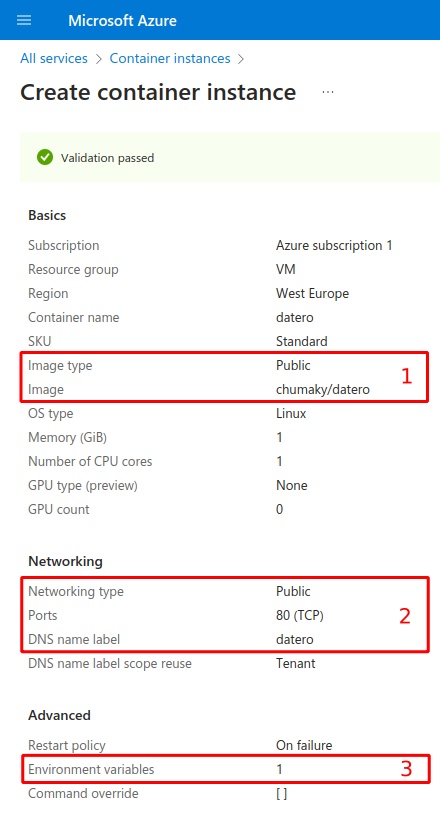
1. container image
To specify the image to run, it's required to specify repository and tag.
Here we specify our all-inclusive chumaky/datero image, which defaults to latest tag.
2. public IP
To make Datero web application accessible from the outside world we have to specify Networking type: Public.
That will assign a public IP to the container instance.
We also have to open 80 HTTP port to allow access to the Datero web application.
Optionally, you could specify a seed value for the dynamic FQDN that will be assigned to your deployment.
3. environment variables
There is also container parameters section. It shows that we have one environment variable specified.
It corresponds to the POSTGRES_PASSWORD environment variable.
Which is the only mandator parameter to specify during container launch.
It's dictated by the official image of postgres database.

Create deployment
When all the parameters are specified, you can press Create button on the last Review screen. It will create a Deployment which is a process of creating a container instance with the specified parameters.

If everything is correct, you will get a Resource created.
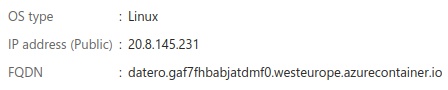
By clicking on it you will see its details.
We are interested in the public IP address of the container instance.
Alternatively, you could use the FQDN that was assigned to the resource.
As you could see, it got created with our datero seed value specified in DNS name label field put at first place.
Access Datero UI
Once we got our public IP address or FQDN, we can access Datero web application. Here we access it by the FQDN.
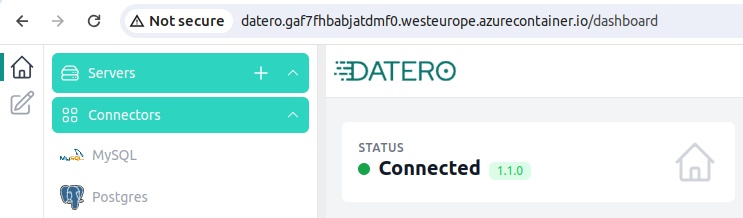
Congratulations! You have successfully installed Datero on Azure ACI.
Next steps
You might find it useful to check the Overview section. It will make you familiar with what you will get after the installation.
More details on initial setup could be found in Installation section.
For complete use-case example, please go to the Tutorial section.
For individual datasources configuration, please refer to Connectors section.